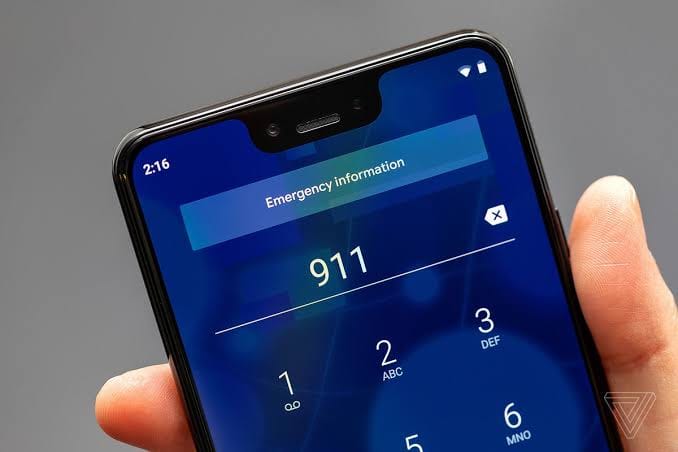
Putting your phone on a password is one thing that has an advantage as well as a disadvantage. The disadvantage mostly occurs when emergency contacts are to be made on your behalf.
Those moments when people are needed to be contacted on your behalf because you are in danger or when you have misplaced your android phone and those that saw it wish to reach you for recovery.
The most common practice in situations like that will always be to remove the SIM card from the phone and place it on another phone. But this has its own limitations as the needed numbers might be saved on your phone storage or the SIM card also locked.
Phones now come with a feature that can help you set up emergency contacts to call or an emergency button to press in order to reach such contacts.
How to Add Emergency Contacts To Your Android Phones
Ways you can add emergency contacts to your android phones differ. It depends on the product or the android version you are using. One way it is done in many MTK phones is by using Emergency information settings.
With the emergency information settings, you can add phone numbers people can call through your phone without having to put your password in case of an emergency. Not only that, but you can also include information like your address, blood group, allergies, medications, etc.
These information can be accessed by anyone on your phone without having to put your password.
To set up your emergency information, put your Android phone in a lock screen view. The lock screen view is how your phone looks before you enter your password or pattern.
Then press the power button to display where you can draw your pattern or input your password as shown below.
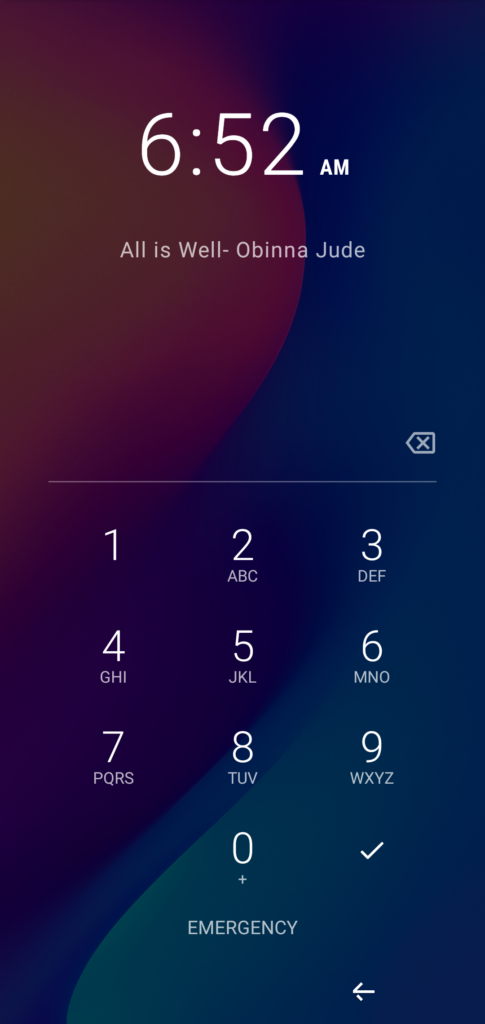
Instead of drawing your pattern, tap or click on EMERGENCY. Another option Emergency Information will appear, tap on it twice. A page will appear where you can add emergency contacts and other emergency details.
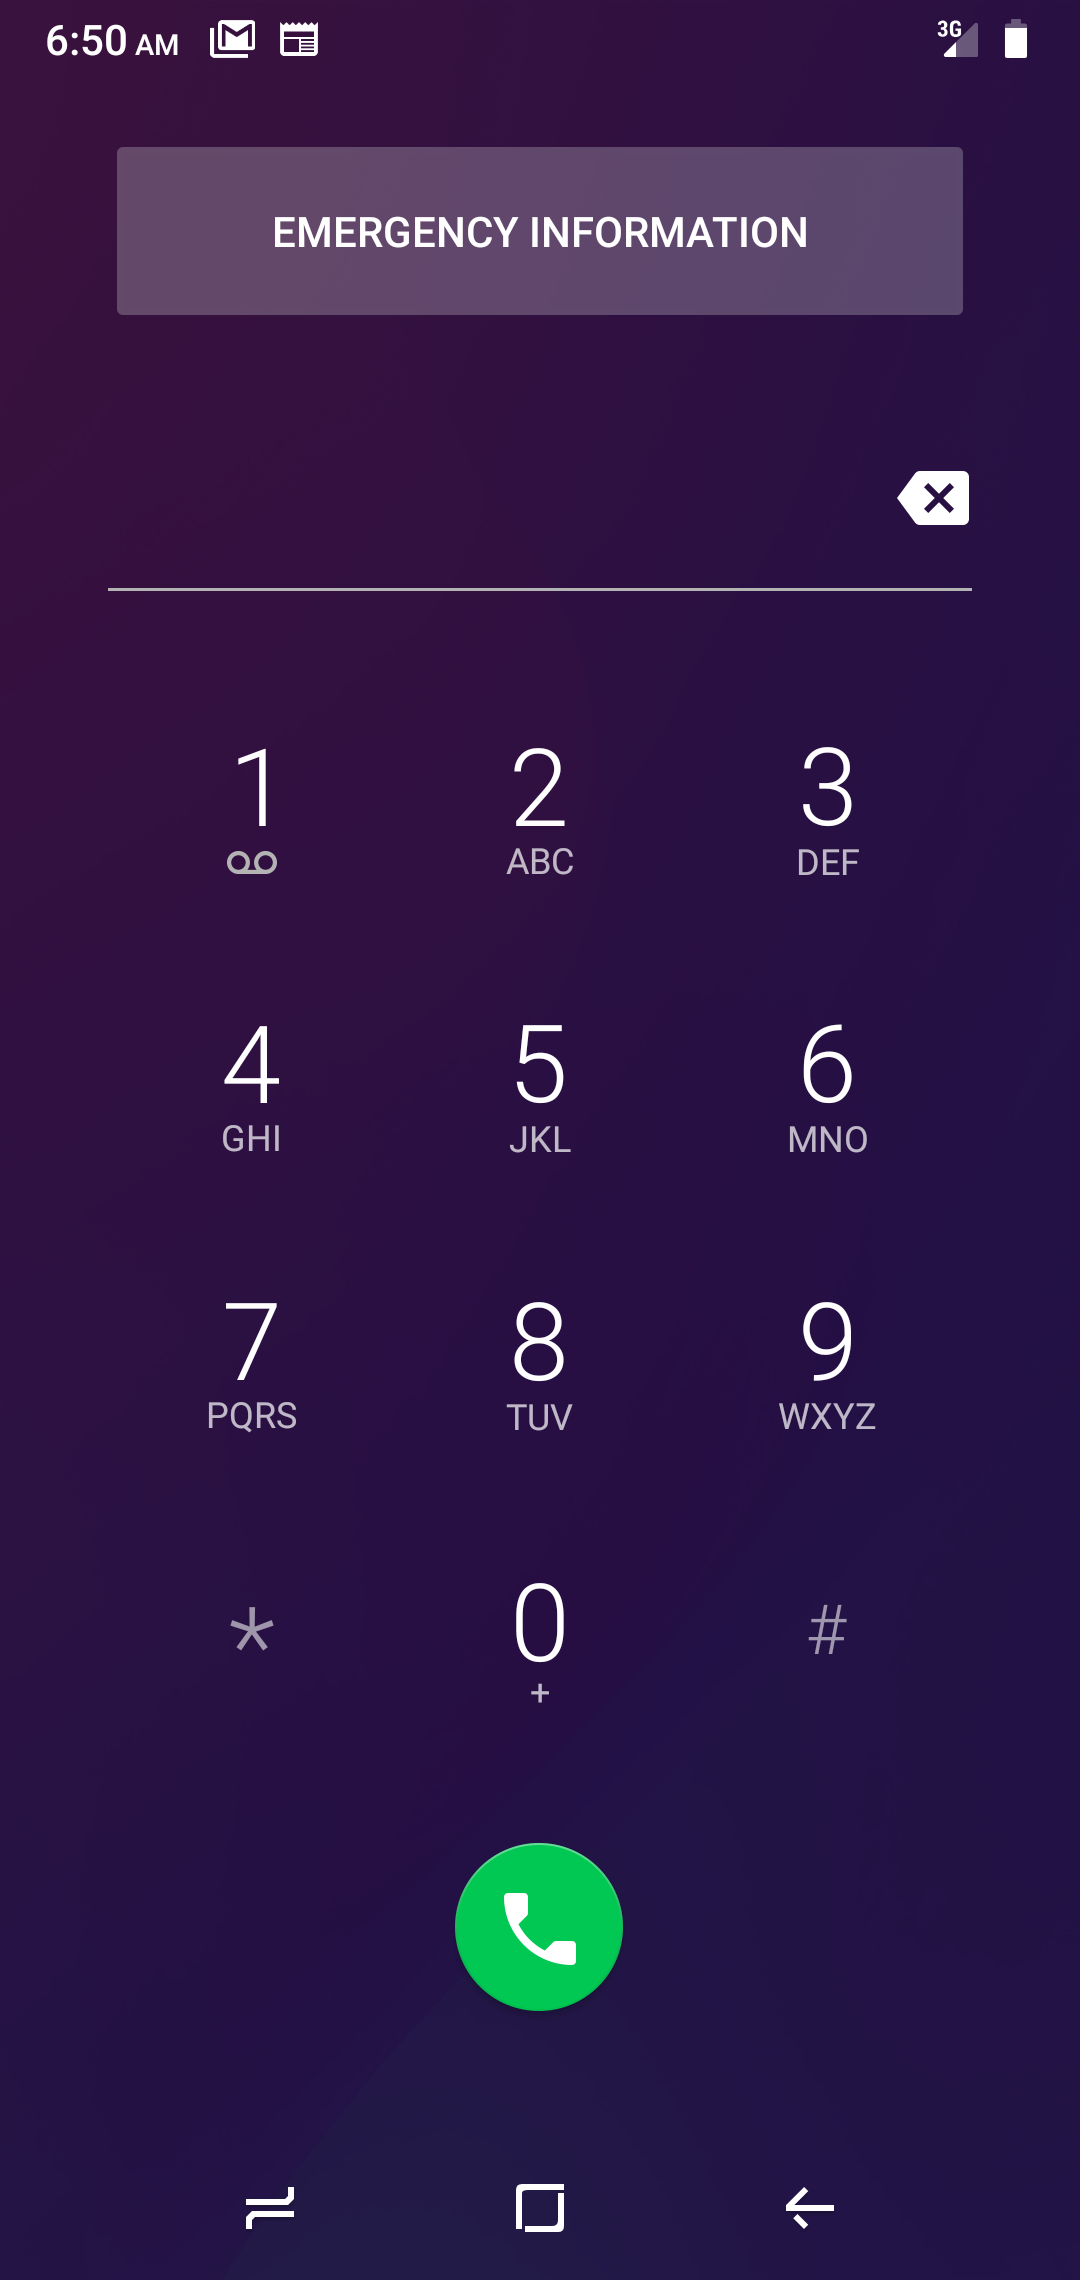
You will be prompted to input your password before you can be able to add any emergency details.
In case you find yourself in situations where you are the one trying to help someone contact his or her next of kin, you can also check the person’s Emergency information following the same steps above.
The only difference is that you can only view the emergency information added by the user.
Search for emergency information on your settings if the above settings is not working for you. It will help you to check if the feature is available on your phone.
Suggested Post: How to Track Stolen or Lost Android Phone
How To Enable Emergency Contacts SOS Safety Alert On Your Android Phones
The emergency SOS is very important in the case of an emergency alert. With this, you can contact people on your emergency contacts list by the press of a button. Some phones will require you to press the power button 3, 4, or 5 times fast to trigger an emergency alert to your contacts. The alert will send your location to your emergency contacts and the list of the last phone numbers you called on your phone.
This feature is very important for safety and for parents to activate for their wards.
To enable emergency SOS on your android is very easy. But remember that this feature is not available on all android phones. To check if the feature is available on your phone, open your phone settings and type Emergency SOS on the settings search box.
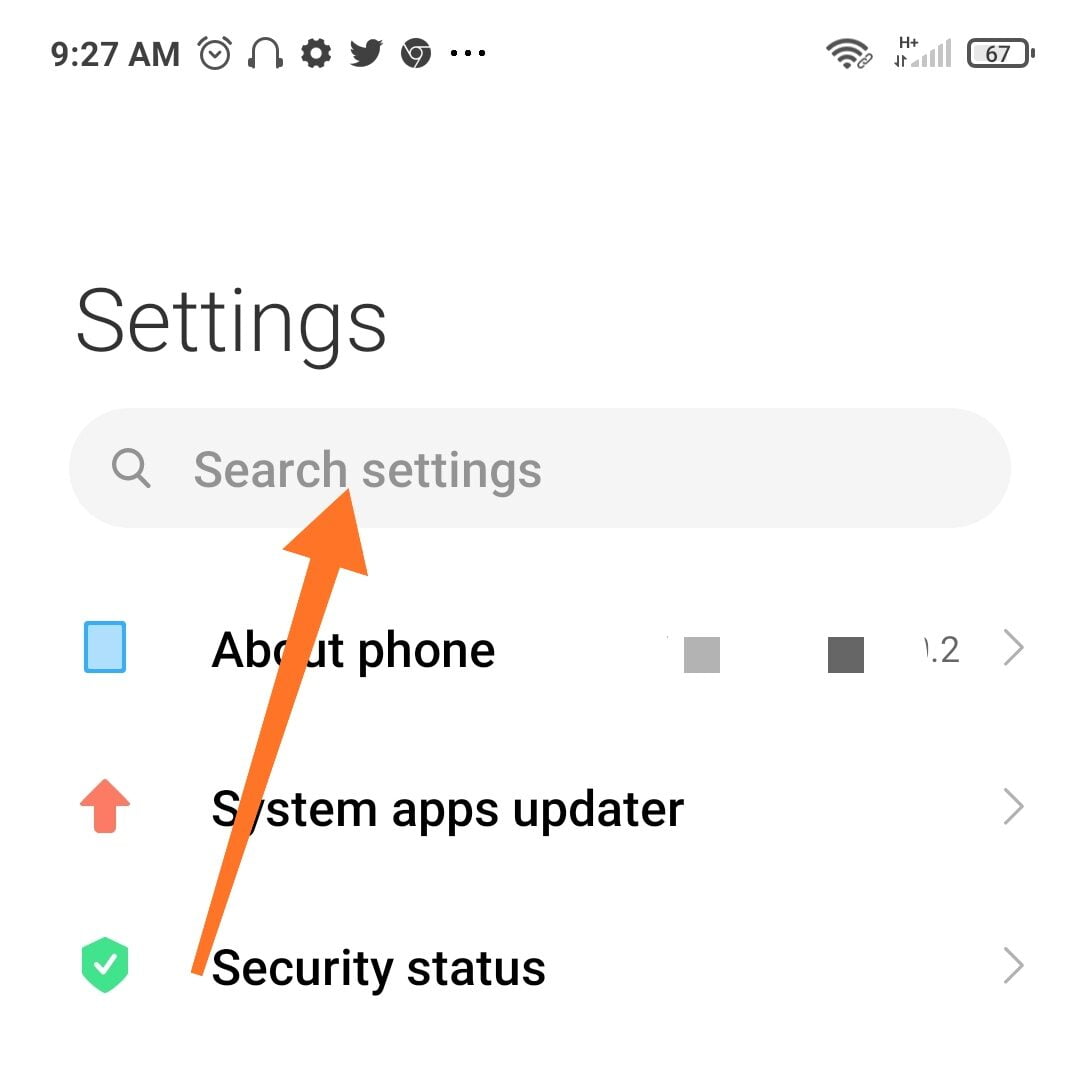
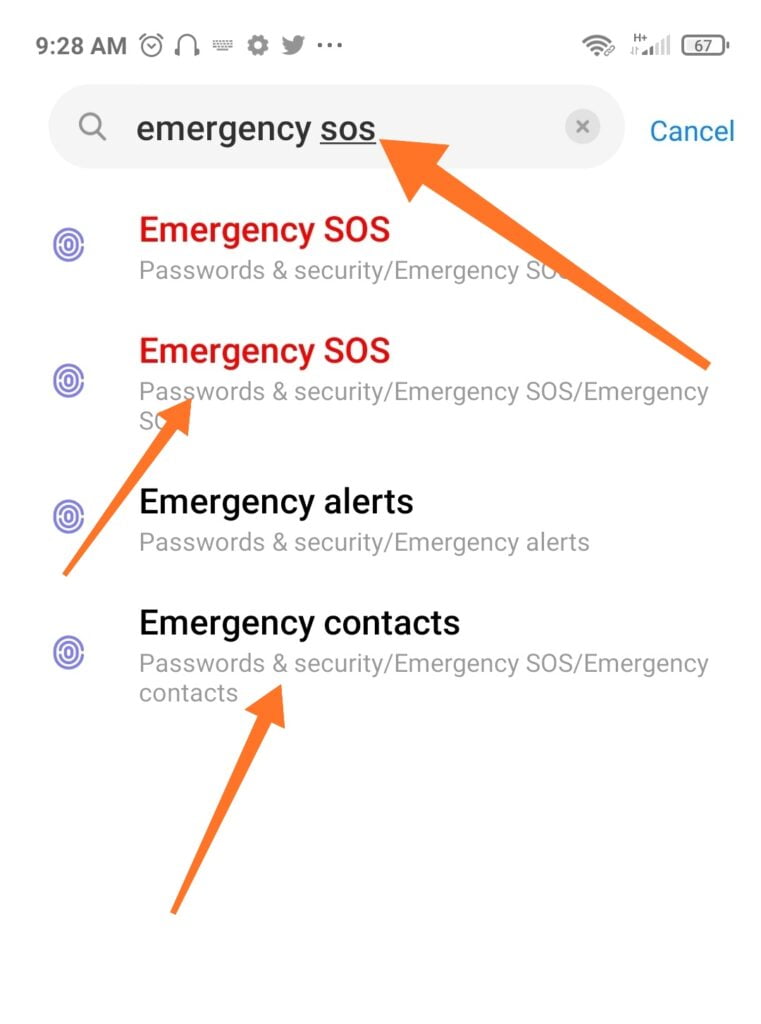
The search results will appear if it is available on your phone. Then select the Emergency SOS option or Send SOS Messages. Depending on the one that appears due to your phone type.
You will see the button to enable it; toggle the button on if it was off. Then, add your emergency contacts. Some phones will prompt you to add emergency contact once you turn it on. While in some you will have to manually select the emergency contacts option to add them. Whichever way make sure you add your emergency contacts.
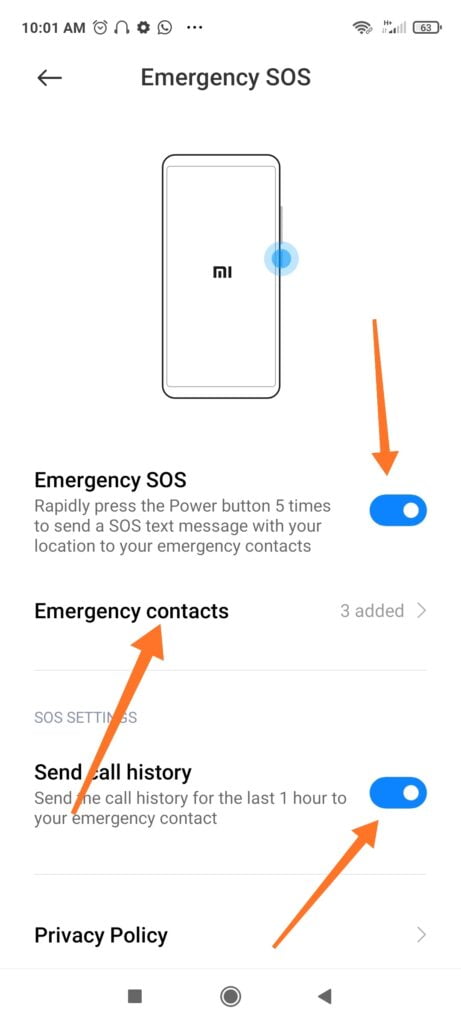
You can also enable other options to allow the alert to send your call history and location to your contacts. Some phones will also give you the opportunity to choose how many times to press the trigger button.
How to Add Emergency Contacts on iPhone
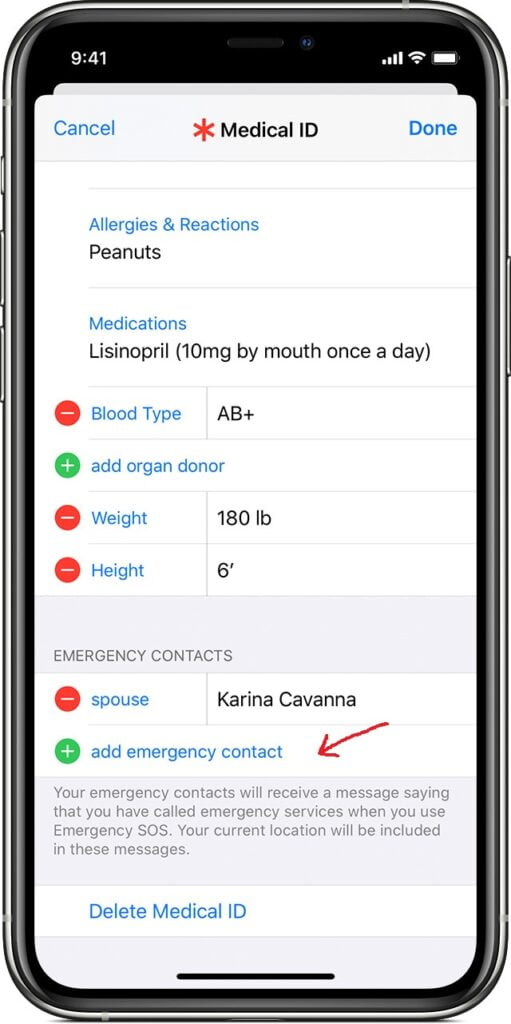
- Open the Health app and tap your profile picture symbol.
- Tap Medical ID.
- Tap Edit, then scroll to Emergency Contacts.
- Tap the add button or the Plus sign to add an emergency contact.
- Tap a contact, then add their relationship.
- Tap Done to save your changes.
How to Make Emergency SOS Calls In An iPhones
Emergency SOS is active by default on most iPhones. But when you make a call with SOS, your iPhone automatically calls your local emergency number instead. It will also send messages to your emergency contacts after the call.
You can also turn on Call After Severe Crash to make your iPhone call emergency contacts if you are involved in an accident.
How to make the call with SOS on iPhone 8 or later:
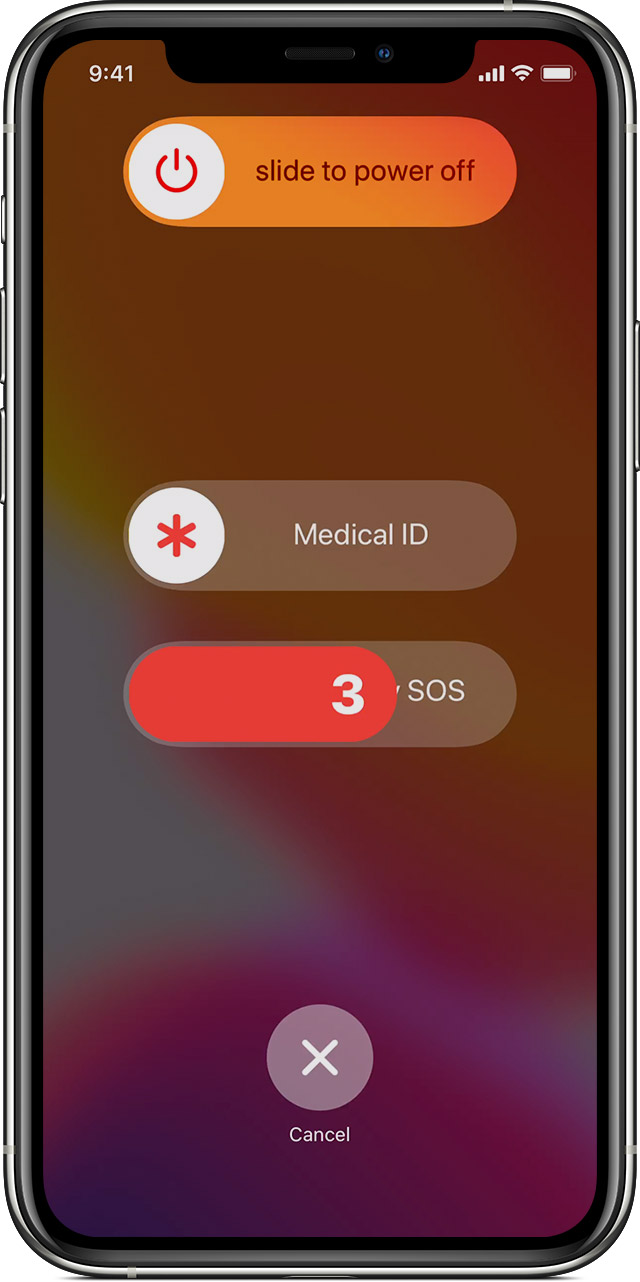
- Press and hold the side button and one of the Volume buttons until the Emergency SOS slider appears.
- Drag the Emergency SOS slider to call emergency services.
- If you continue to hold down the side button and Volume button instead of dragging the slider, a countdown begins and an alert sounds. If you hold down the buttons until the countdown ends, your iPhone automatically calls emergency services.
How to make the call with SOS on iPhone 7 or earlier:
- Rapidly press the side (or top) button five times. The Emergency SOS slider will appear. (In India, you only need to press the button three times, and then your iPhone automatically calls emergency services.)
- Drag the Emergency SOS slider to call emergency services.
After the call ends, your iPhone sends to your Emergency contacts a text message with your current location, unless you choose to cancel. If Location Services is off, it will temporarily turn on. If your location changes, your contacts will get an update, and you’ll get a notification about 10 minutes later.
This is a very necessary setup to have on your phones in case of danger or emergency. Try and enable any of the settings on your phone, if available. You can use the trigger button to help people in an emergency when you have their phone.
